Apple Mail Email Signature
Published: 08.04.2026
Add Email Signature to Apple Mail
Step 1.
Open the Mail program on your Apple MAC.
Click in the top left corner on Mail.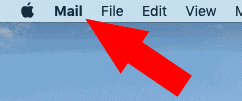
Step 2.
Click on Preferences, a screen will appear.
In that screen at the top, click Signatures and the Signatures menu will appear.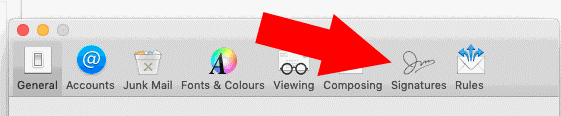
Step 3.
In the Signatures menu, click the Plus icon +.
Name your signature.
Here you can make your signature: if you want pictures you can drag them in. Fill in the signature with place holder text, this text will be overwritten later.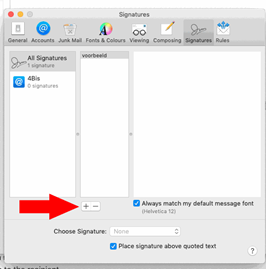

Step 4.
Go to Finder and click Go in the top menu bar.
Click on Go to Folder… A screen will now appear.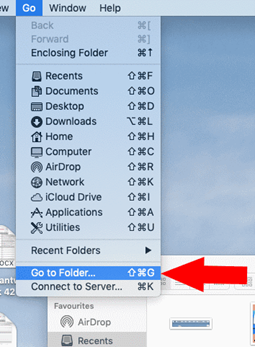
Step 5.
In the bar, type ~/library/Mail.
Open the folder V with the highest number next to it.
Open the MailData folder.
Then open the Signatures folder and locate the file with the latest Modified date and time.
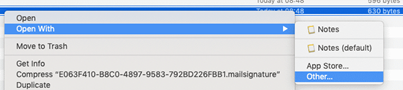
Right click on this file, move your mouse to Open With.
Click on Other...
Search this list for TextEdit and click Open.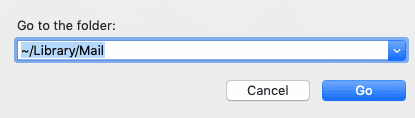
Step 6.
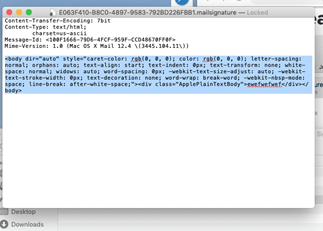
Remove all text from and paste your html code here.
Save the file by pressing CMD + S simultaneously.
In the screen next to the file name, click the arrow pointing down.
Click the checkbox next to Locked so that it has a check mark.
You are now done! The window can be closed. After restarting the Apple Mail program, your mail signature can be used.